Product-photo cleanup should make the item easier to inspect, not change what is being sold. Remove temporary clutter, preserve the product’s real shape and finish, standardize the frame, and verify the final upload against the platform’s requirements.
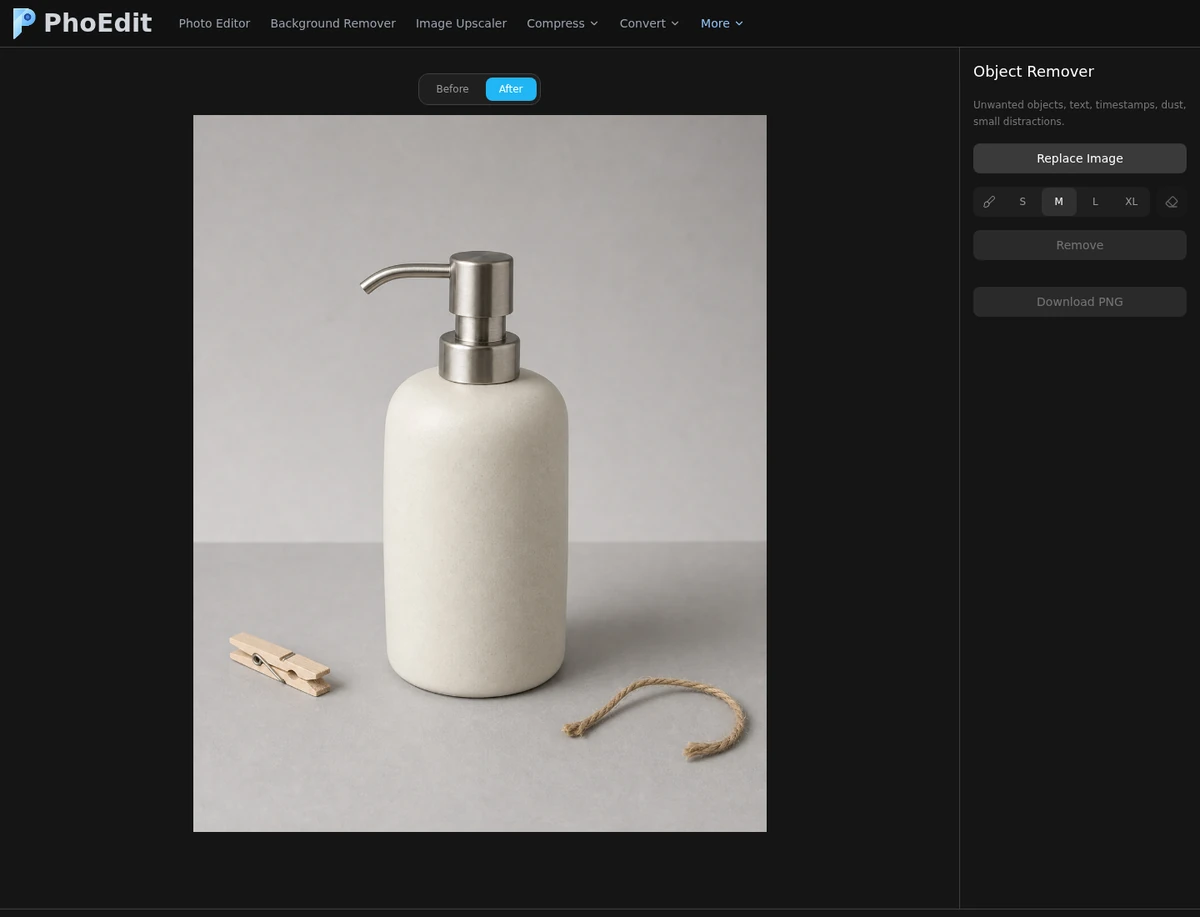
Our test input is an original, unbranded 1122×1402 JPEG of a ceramic dispenser. A wooden clothespin and a short piece of twine were deliberately placed beside it as lawful removable clutter. There are no logos, labels, ownership marks, or third-party rights indicators.
The recommended order
- Keep the original.
- Decide whether you need background removal or only distraction removal.
- Remove small, clearly bounded clutter.
- Inspect the product edge at high zoom.
- Crop to the required ratio.
- Resize every listing image to the same pixel dimensions.
- Compress from the resized master.
- Re-open the downloaded file and perform the platform upload check.
This order avoids compressing artifacts before the edit and avoids repeatedly resampling the same image.
Step 1: choose the correct removal tool
Use Background Remover when the whole backdrop must become transparent. Hair-like fibers, glass, reflective metal, and soft contact shadows are difficult cases; inspect the alpha edge rather than trusting a small preview.
Use Object Remover for isolated clutter on content you own or are authorized to edit. Do not use it to remove watermarks, ownership labels, signatures, or other rights information.
For our fixture, the clothespin and twine are legitimate cleanup targets. The dispenser, pump, contact shadow, and paper sweep must remain unchanged.
Step 2: mask with context
We loaded the product JPEG, selected the XL brush, and drew separate masks over the two clutter objects. The mask did not need to cover the dispenser.
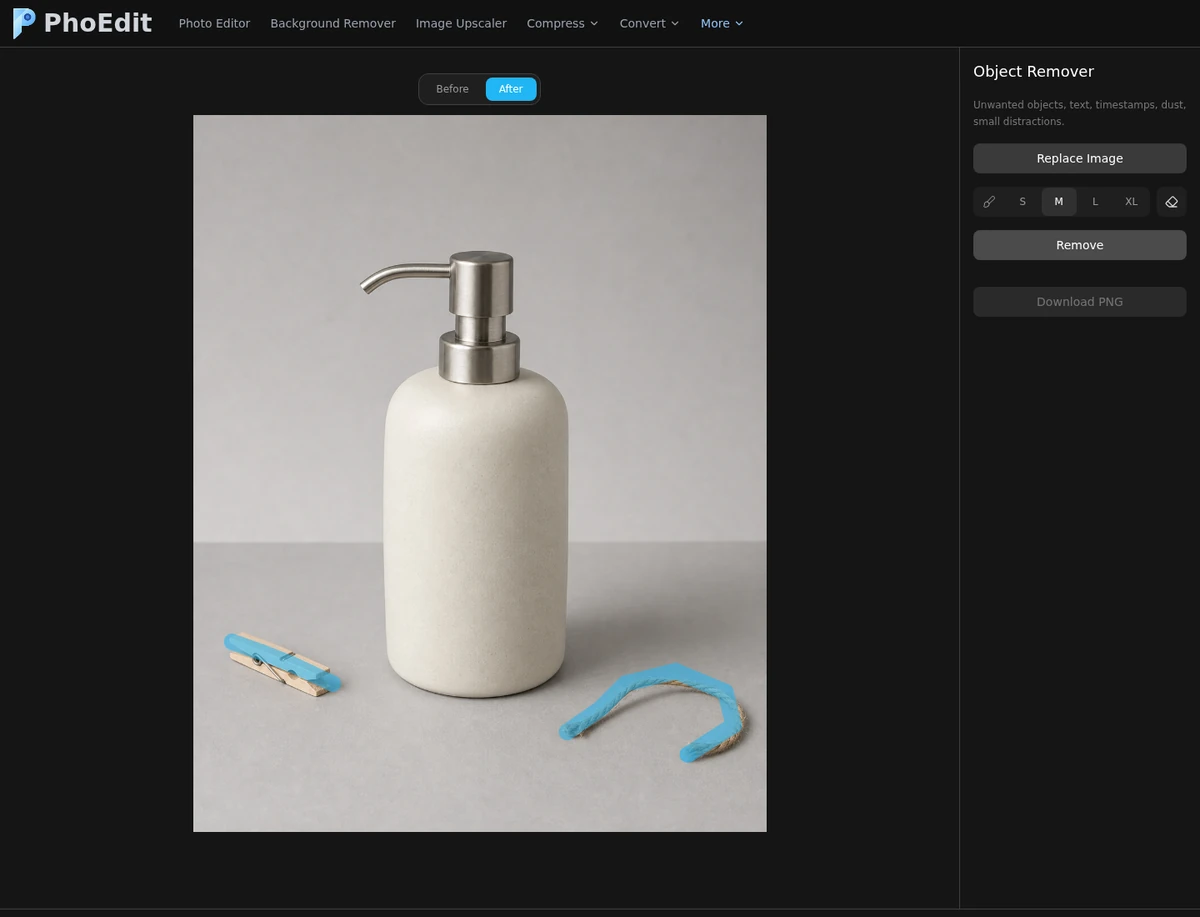
Use a brush slightly wider than the distraction. If the mask touches the product edge, undo and use a smaller brush. Removing one object at a time makes it easier to identify which mask caused a bad fill.
Result of this run
The Remove action was invoked, but no cleaned image was produced. The local page could not load migan_pipeline_v2.onnx from models.phoedit.com because of CORS/WAF restrictions from the test network. The Download PNG button remained disabled.
That is a real compatibility result, not a visual cleanup result. The two screenshots prove upload and masking; they do not show an inpainted output. Readers seeing the same failure can use the browser console to distinguish a model-host problem from a bad mask.
Step 3: inspect a successful removal
When the model is available, switch between Before and After and examine:
- the silhouette of the dispenser;
- the tabletop texture where each object was removed;
- repeated or smeared patterns;
- the natural contact shadow;
- color or brightness seams around the fill.
If a large area looks synthetic, restore the original and try a smaller mask. For a complex product boundary, a manual editor may be safer than generative filling.
Step 4: crop consistently
Choose the destination ratio before resizing. A marketplace may require square images; a catalog card may use 4:5.
Open Photo Editor and crop with enough breathing room around the product. Keep the pump and the base away from the edge. The current tested crop UI is freeform rather than a preset-ratio selector, so verify the final output dimensions instead of assuming the drag box is exactly square.
Step 5: standardize dimensions
Use Resize Image after cleanup and crop:
- enter the destination width;
- keep the aspect ratio locked;
- choose PNG if transparency must remain;
- choose JPG for an opaque listing with a solid background;
- verify the downloaded width and height.
Do not enlarge a small cleanup result expecting genuine new product detail.
Step 6: compress only after the geometry is final
Run the resized file through Compress Image. Start with Medium and inspect ceramic texture, pump edges, and the soft shadow. A target-size setting is useful for a strict upload limit, but verify the real bytes.
If the source has transparency, confirm that the final workflow did not convert it to JPG. In a separate PhoEdit format test, PNG retained alpha while JPG removed it.
Final upload check
Before publishing:
- the product is accurate and not materially altered;
- authorized clutter is gone;
- no rights or safety information was removed;
- crop and dimensions match the platform;
- the background color or alpha channel is correct;
- edges are clean at 100% zoom;
- the file is below the byte limit;
- the downloaded image opens in a second viewer;
- multiple listing images use consistent framing.
A future allowed-origin validation can add the cleaned PNG, its dimensions and bytes, a 100% edge crop, and a production-origin screenshot. Until then, this field note makes no claim about PhoEdit’s inpainting quality; it documents the lawful setup, the proven mask workflow, the observed failure mode, and the checks required for any successful result.