Aspect ratio describes shape, not pixel size. A 1:1 image can be 400×400 or 2000×2000. Cropping decides which part of the scene survives; resizing decides how many pixels the result contains.
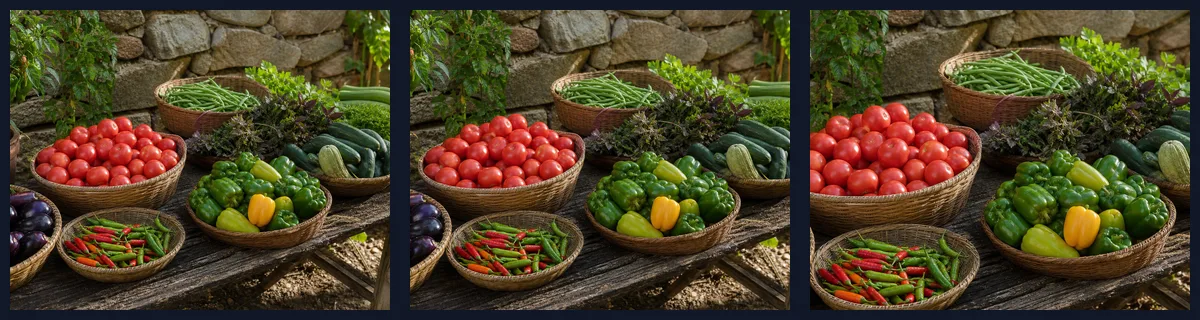
We used the same 1536×1024, 3:2 market photograph for three controlled center crops:
| Use case | Ratio | Output dimensions | JPEG bytes |
|---|---|---|---|
| Wide banner or video thumbnail | 16:9 | 1536×864 | 622,992 |
| Square card | 1:1 | 1024×1024 | 475,796 |
| Portrait card | 4:5 | 819×1024 | 345,819 |
All three controlled crops used ImageMagick 7, center gravity, stripped metadata, and JPEG quality 90. They are reproducible comparison outputs; PhoEdit’s current Photo Editor does not expose exact-ratio preset buttons. The panels below run left to right as 16:9, 1:1, and 4:5.
Crop, pad, or scale?
Crop
Crop when the destination requires a different shape and the subject has disposable space around it. The square crop removed information from the left and right of the 3:2 source. The 4:5 crop removed even more horizontal context.
Pad
Add whitespace or a background when every part of the source must remain visible. Padding is often preferable for products, documents, and diagrams. It preserves content but makes the subject smaller inside the frame.
Scale
Scale when the ratio is already correct and only pixel dimensions need to change. Scaling a 3:2 image to 900×600 preserves its composition. Scaling it directly to 900×900 without cropping or padding would stretch the subject.
Testing PhoEdit’s Crop mode
We uploaded the market photo to Photo Editor and entered Crop mode. The automation test set the real crop overlay to a centered 1024×1024 rectangle and applied it. The saved layer crop was:
x: 256
y: 0
width: 1024
height: 1024
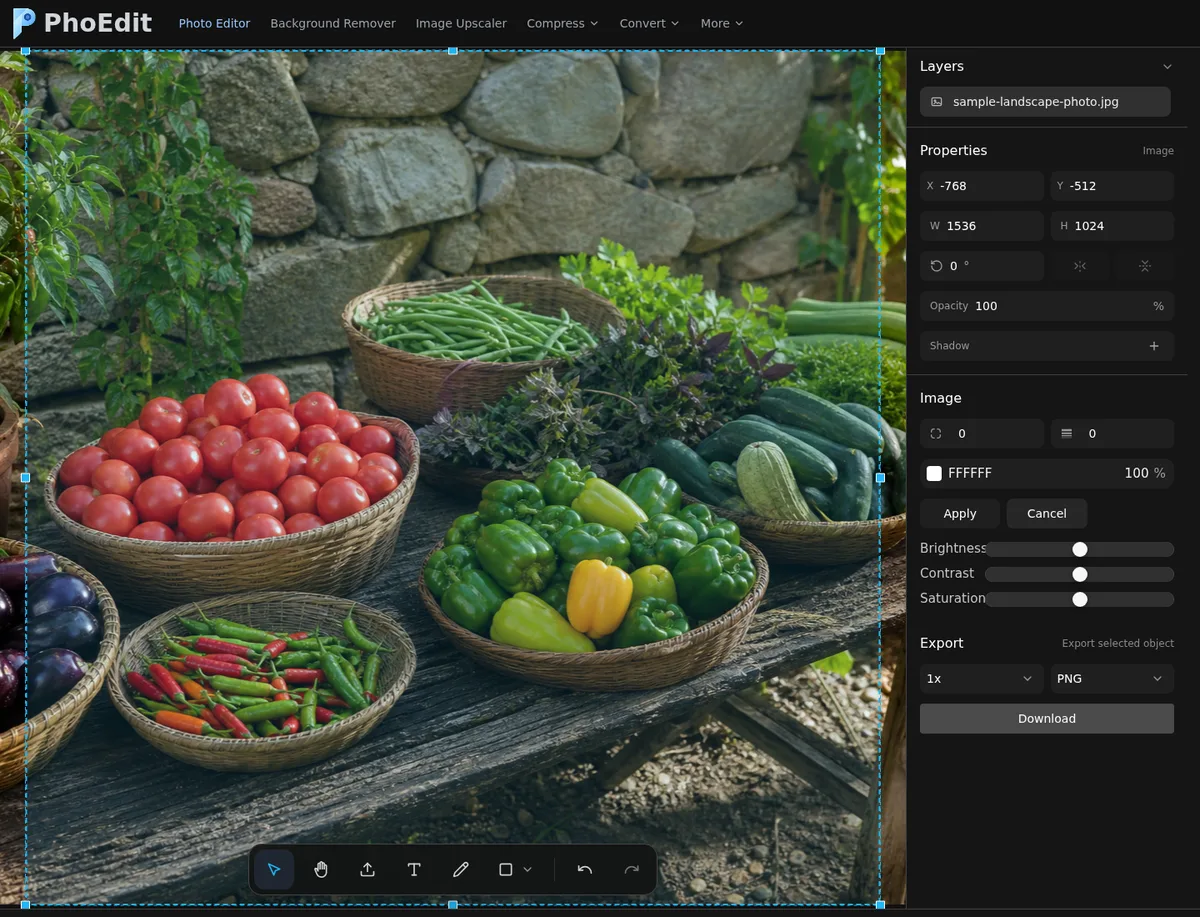
Agent Browser did not reliably capture Photo Editor’s programmatic data-URL download, so no PhoEdit-export byte count is claimed for that square. The exact-ratio table uses separately saved controlled outputs.
For a normal manual workflow:
- Open Photo Editor.
- Upload the original and select its layer.
- Choose Crop.
- Drag the crop rectangle around the subject.
- Apply and export.
- Inspect the downloaded width and height.
Because the tested UI is freeform, use the measured output dimensions as the final ratio check.
JPG or PNG export?
The controlled square photo was saved as both formats:
| Square output | Dimensions | Bytes | Alpha |
|---|---|---|---|
| JPEG, quality 90 | 1024×1024 | 475,796 | No |
| PNG, lossless | 1024×1024 | 2,027,450 | No alpha in this source |
The PNG did not improve detail already encoded in the JPEG source; it only stored the resulting pixels losslessly and was much larger in this test.
Choose JPG for an opaque photograph when controlled loss is acceptable. Choose PNG for transparency, crisp flat graphics, or a lossless intermediate. PhoEdit’s Convert to JPG flattens transparency, while Convert to PNG retained alpha in our separate transparent-fixture test.
Practical framing advice
16:9
Keep important detail away from the extreme left and right because responsive containers may crop further. Check both desktop and mobile previews.
1:1
Centering is not always best. A face, product, or dominant object may need a slightly off-center crop to preserve visual balance. Leave room for badges or UI overlays added by the destination.
4:5
Portrait crops use screen space efficiently, but a landscape source can lose substantial context. Padding may be more honest for a product whose full silhouette matters.
Export verification
After download:
- divide width by height and confirm the intended ratio;
- inspect the subject boundary and important edge content;
- confirm alpha if required;
- check the actual file format, not only the extension;
- inspect JPEG artifacts or PNG size;
- run Resize Image only if the ratio is already correct;
- use Compress Image after final geometry.
Always crop and export from the untouched master. Repeated JPEG edits compound loss.