If you want to compress images on Mac, you already have two built-in options:
- Preview (best for a single image)
- Finder Quick Actions / Shortcuts (best for batch compression, including mixed formats)
Method 1: Compress a single image with Preview (fastest)
Step 1: Open the image in Preview
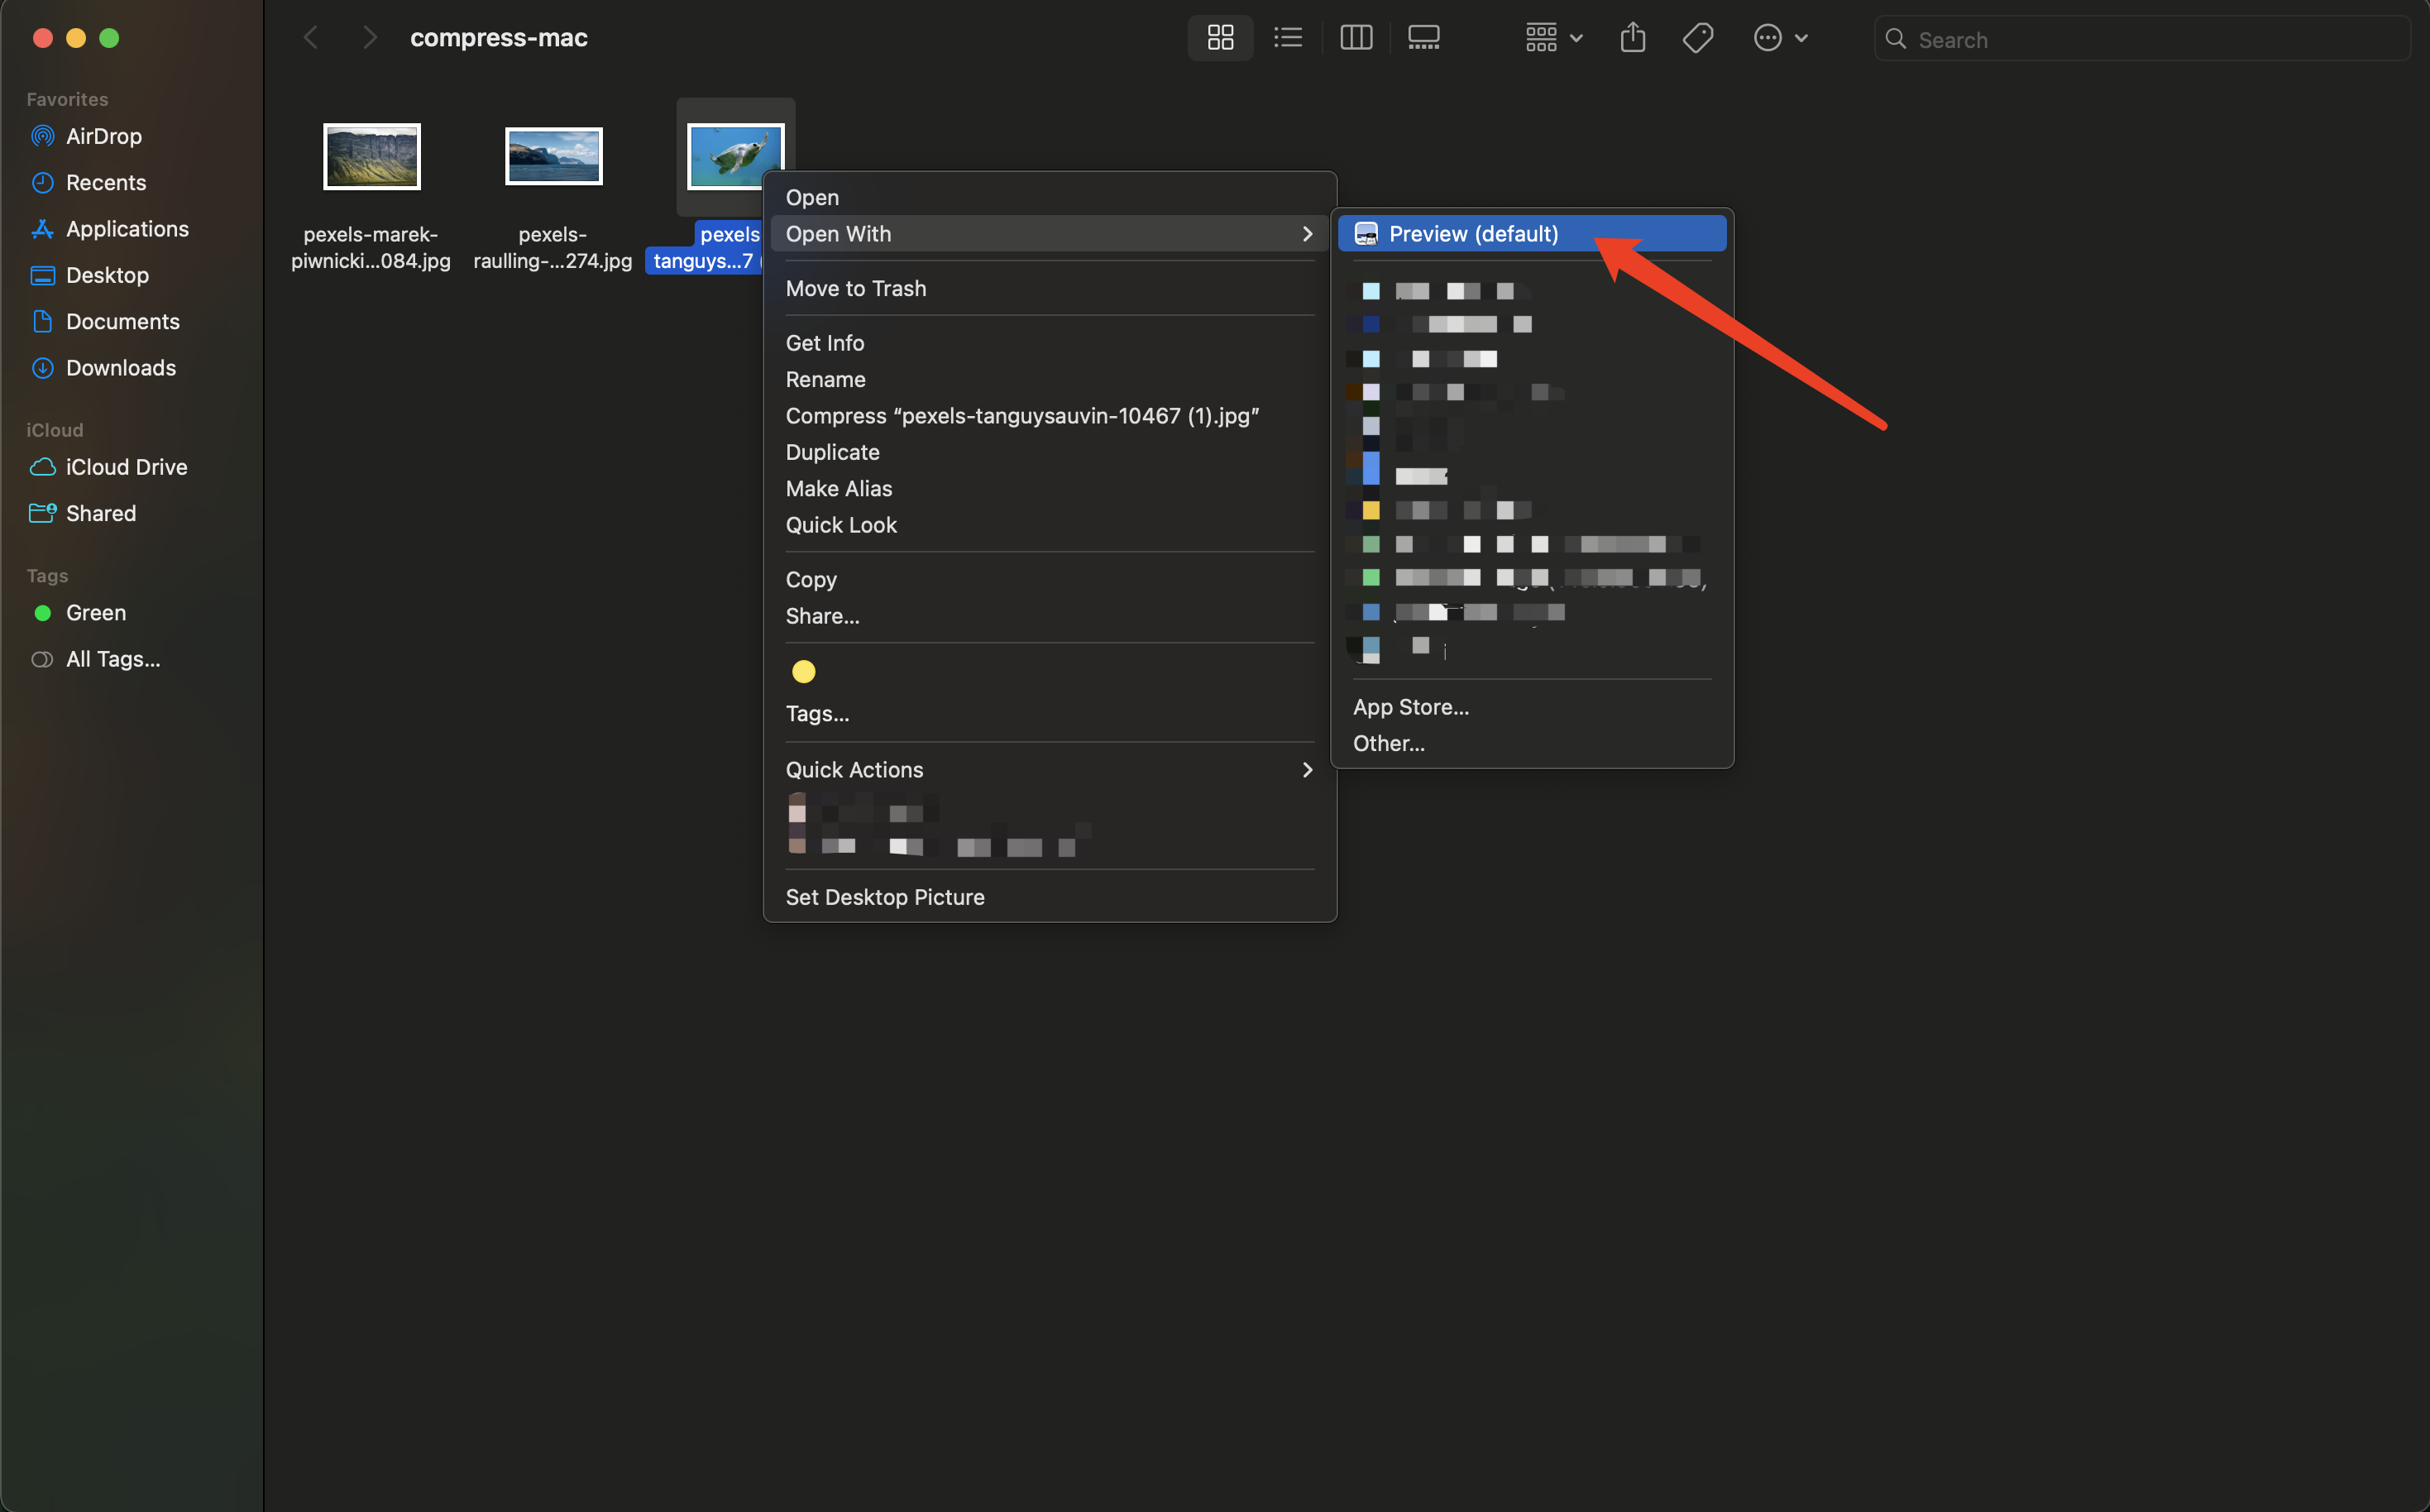
Open an image from Finder, or right-click and choose Open With → Preview.
Step 2: If the image is too large, resize it first
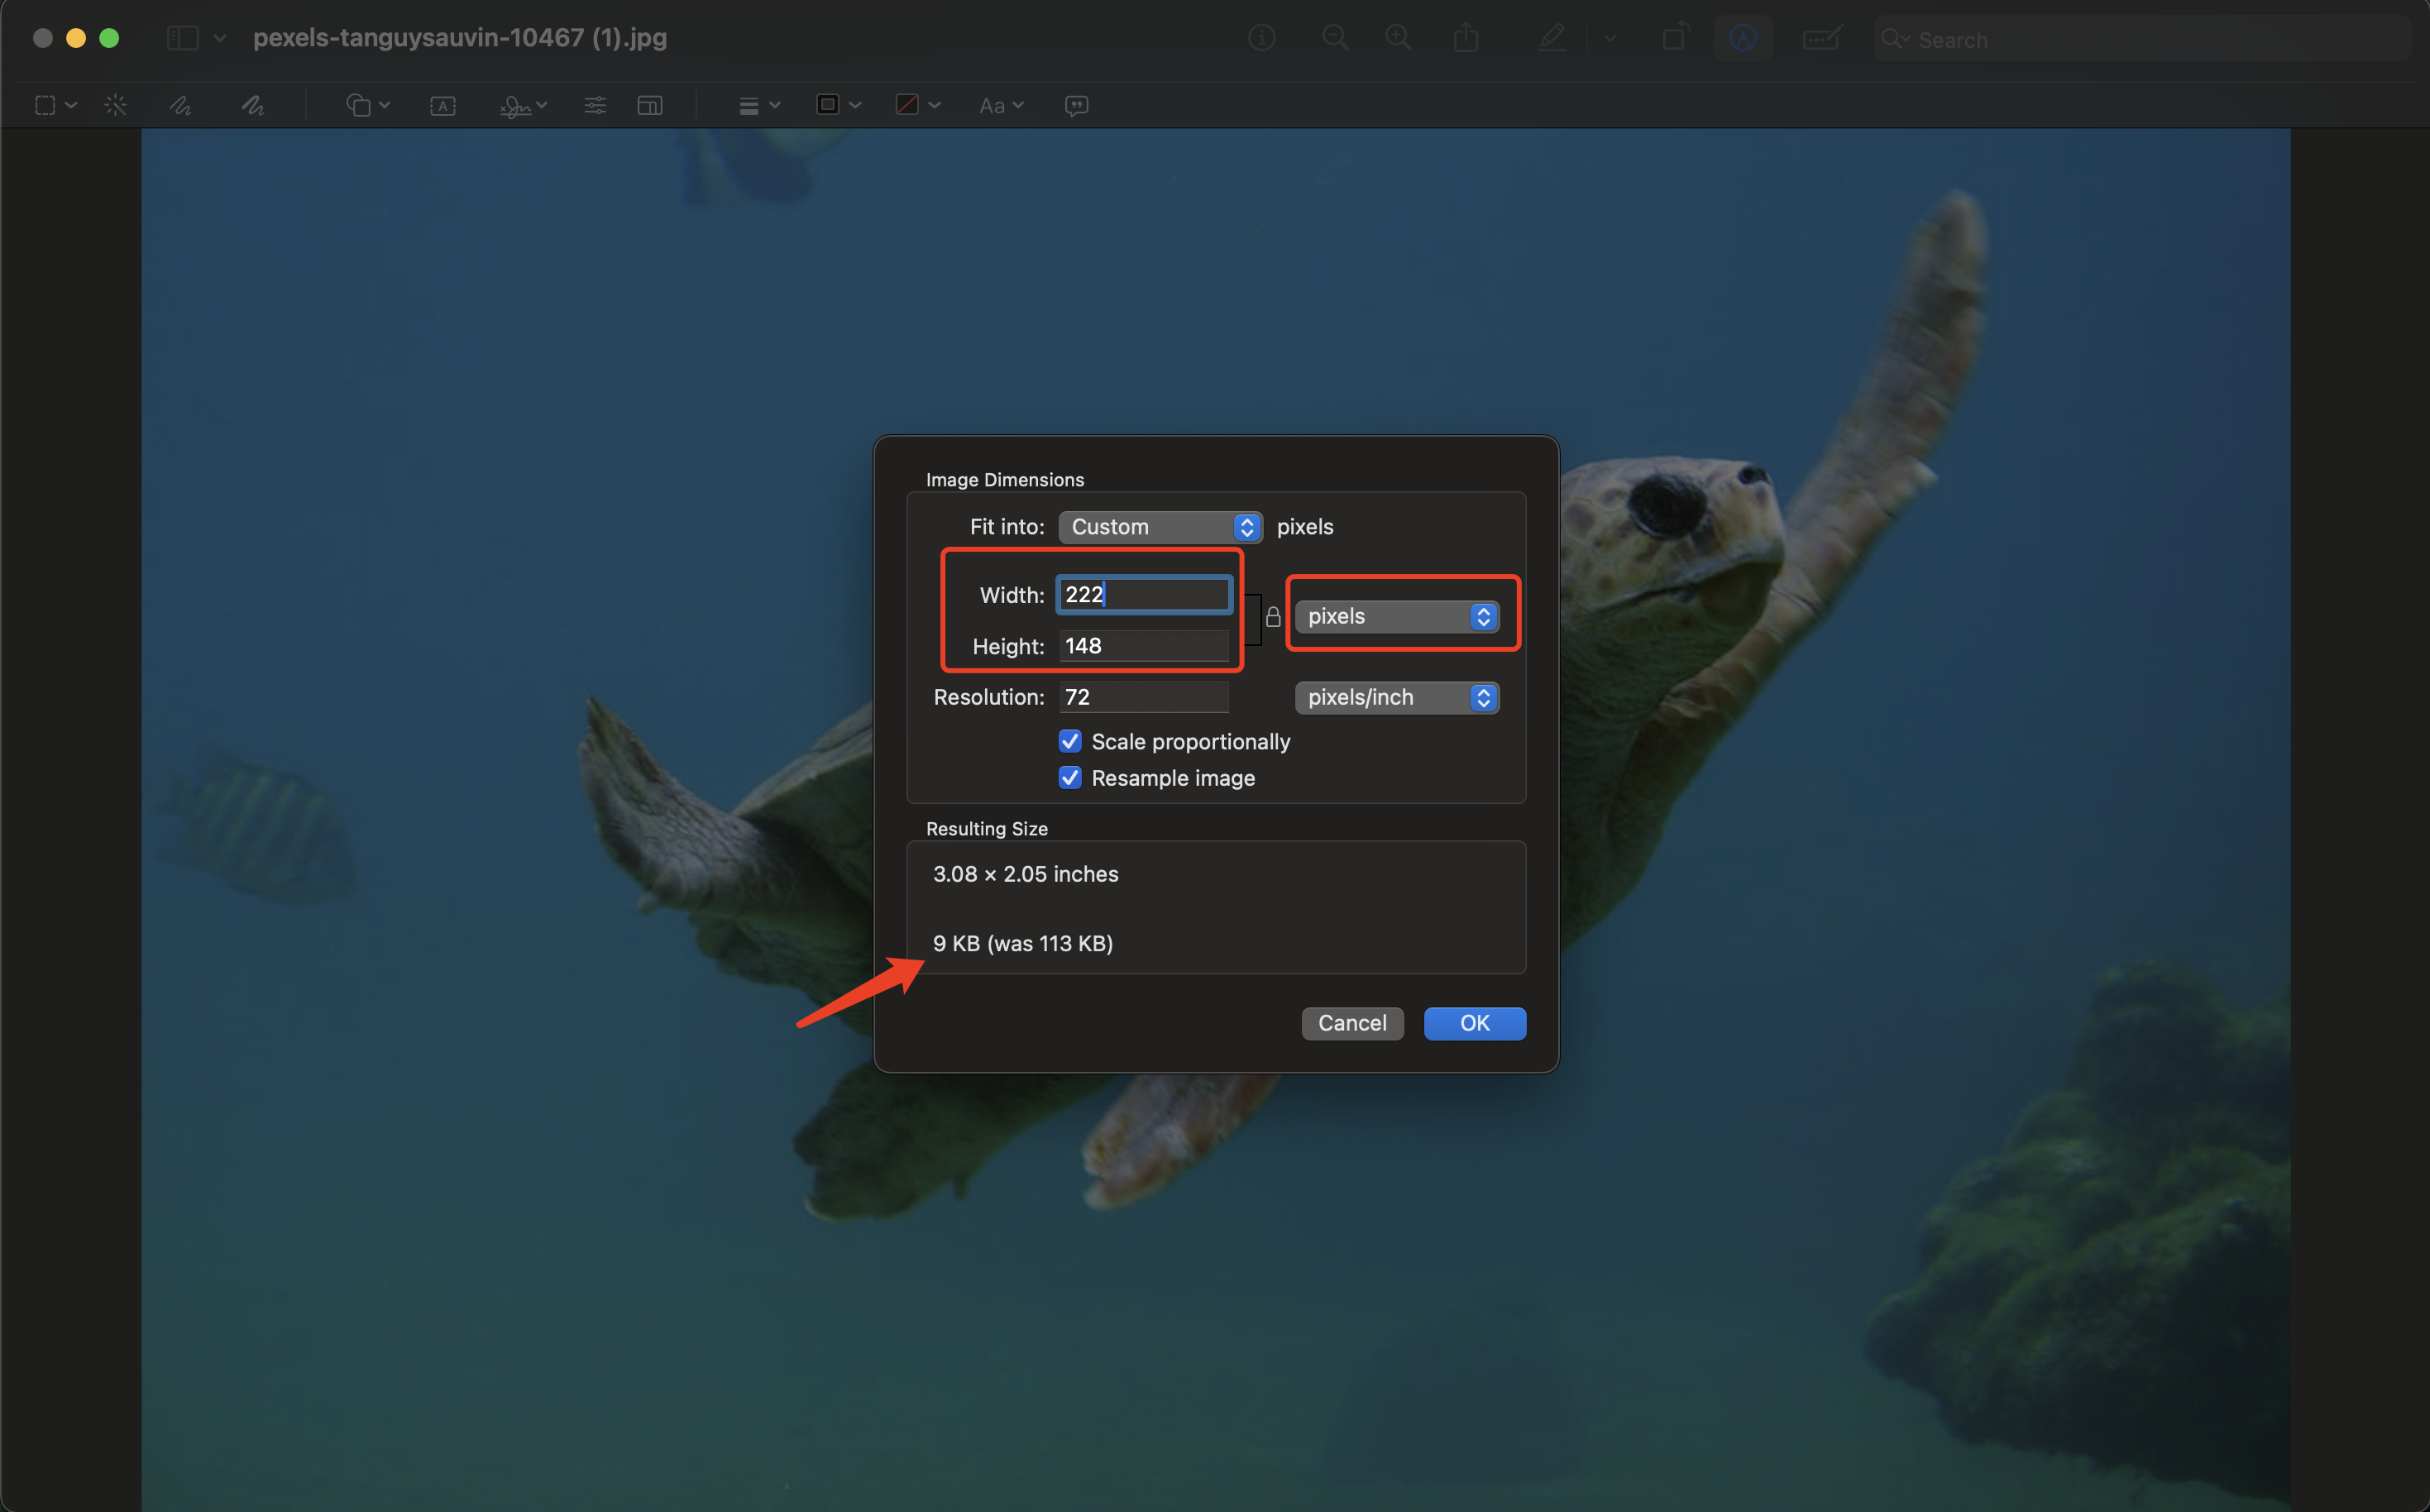
Resizing dimensions is often the biggest file-size win (and usually looks better than pushing compression too far).
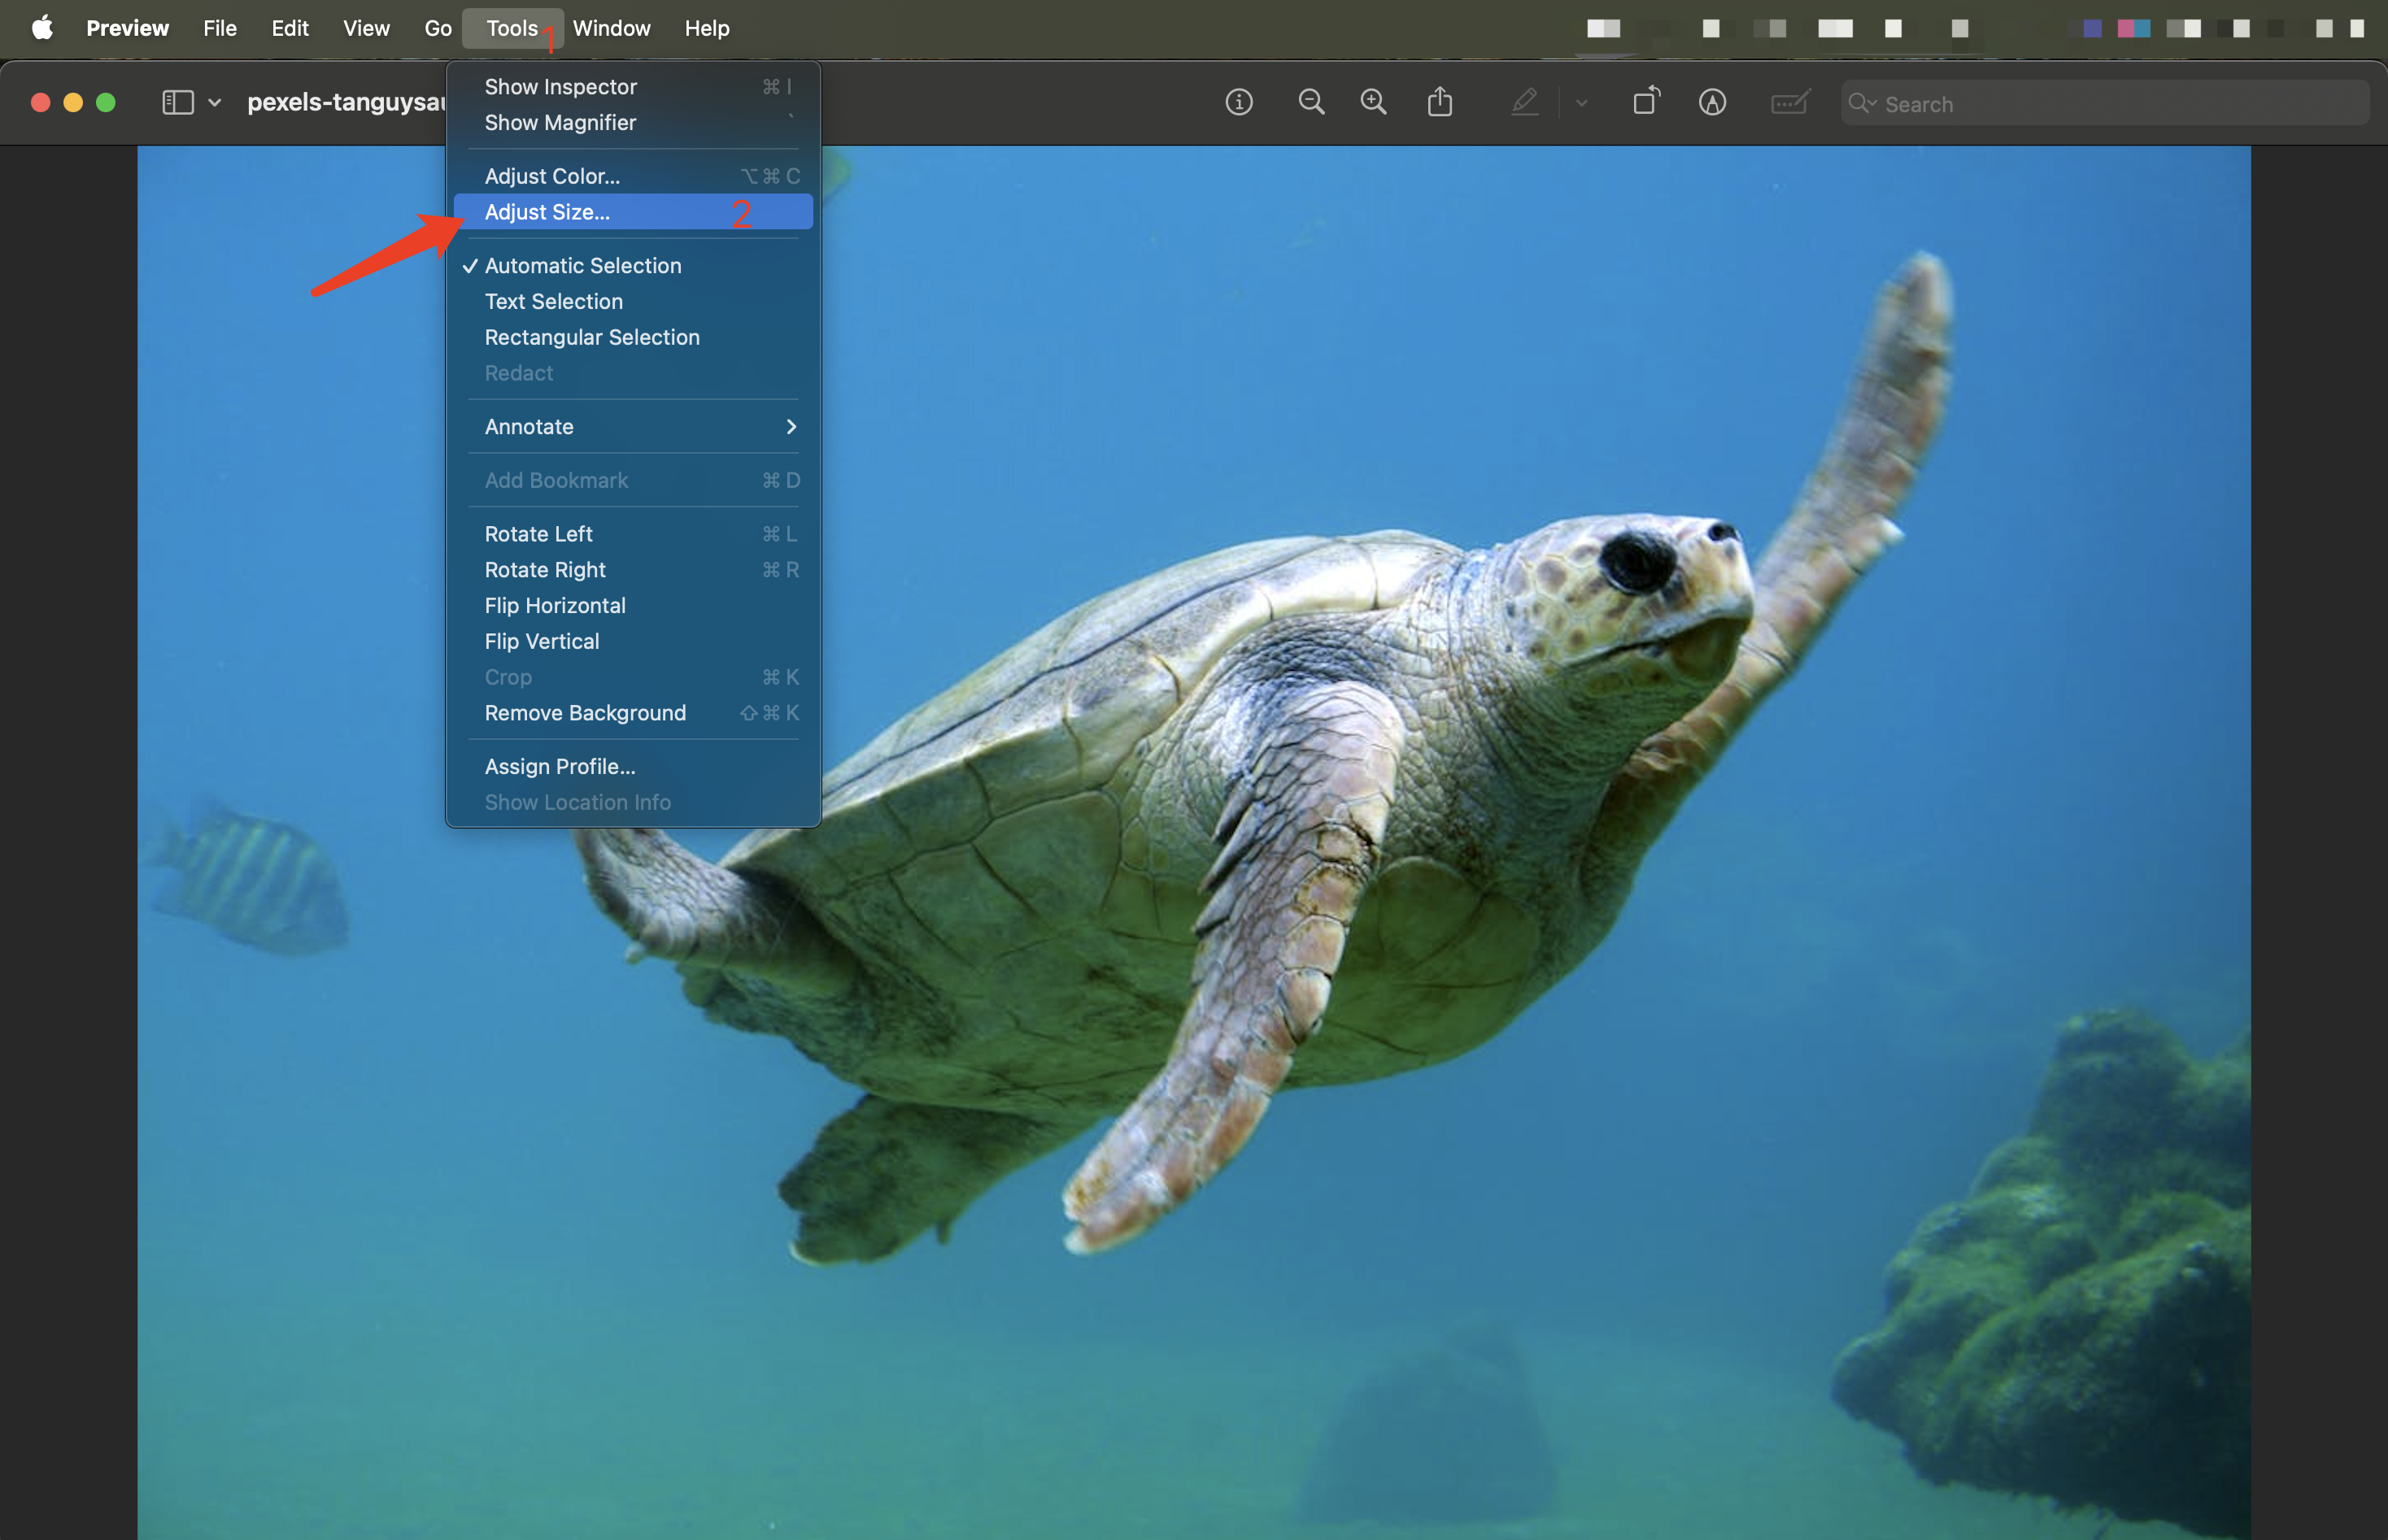
In Preview, go to Tools → Adjust Size…, then reduce the width/height to what you actually need.
Limitation: This workflow is great for a single image, but it becomes slow for large batches—and it’s hard to consistently hit a strict size target (KB/MB) across many files.
Method 2: Batch compress with Finder Quick Actions / Shortcuts (mixed formats)
Mac also supports batch processing in Finder.
Common batch actions include:
- Convert Image (convert format)
- Resize Images (small / medium / large)
Exact options may vary depending on your macOS version and enabled actions.
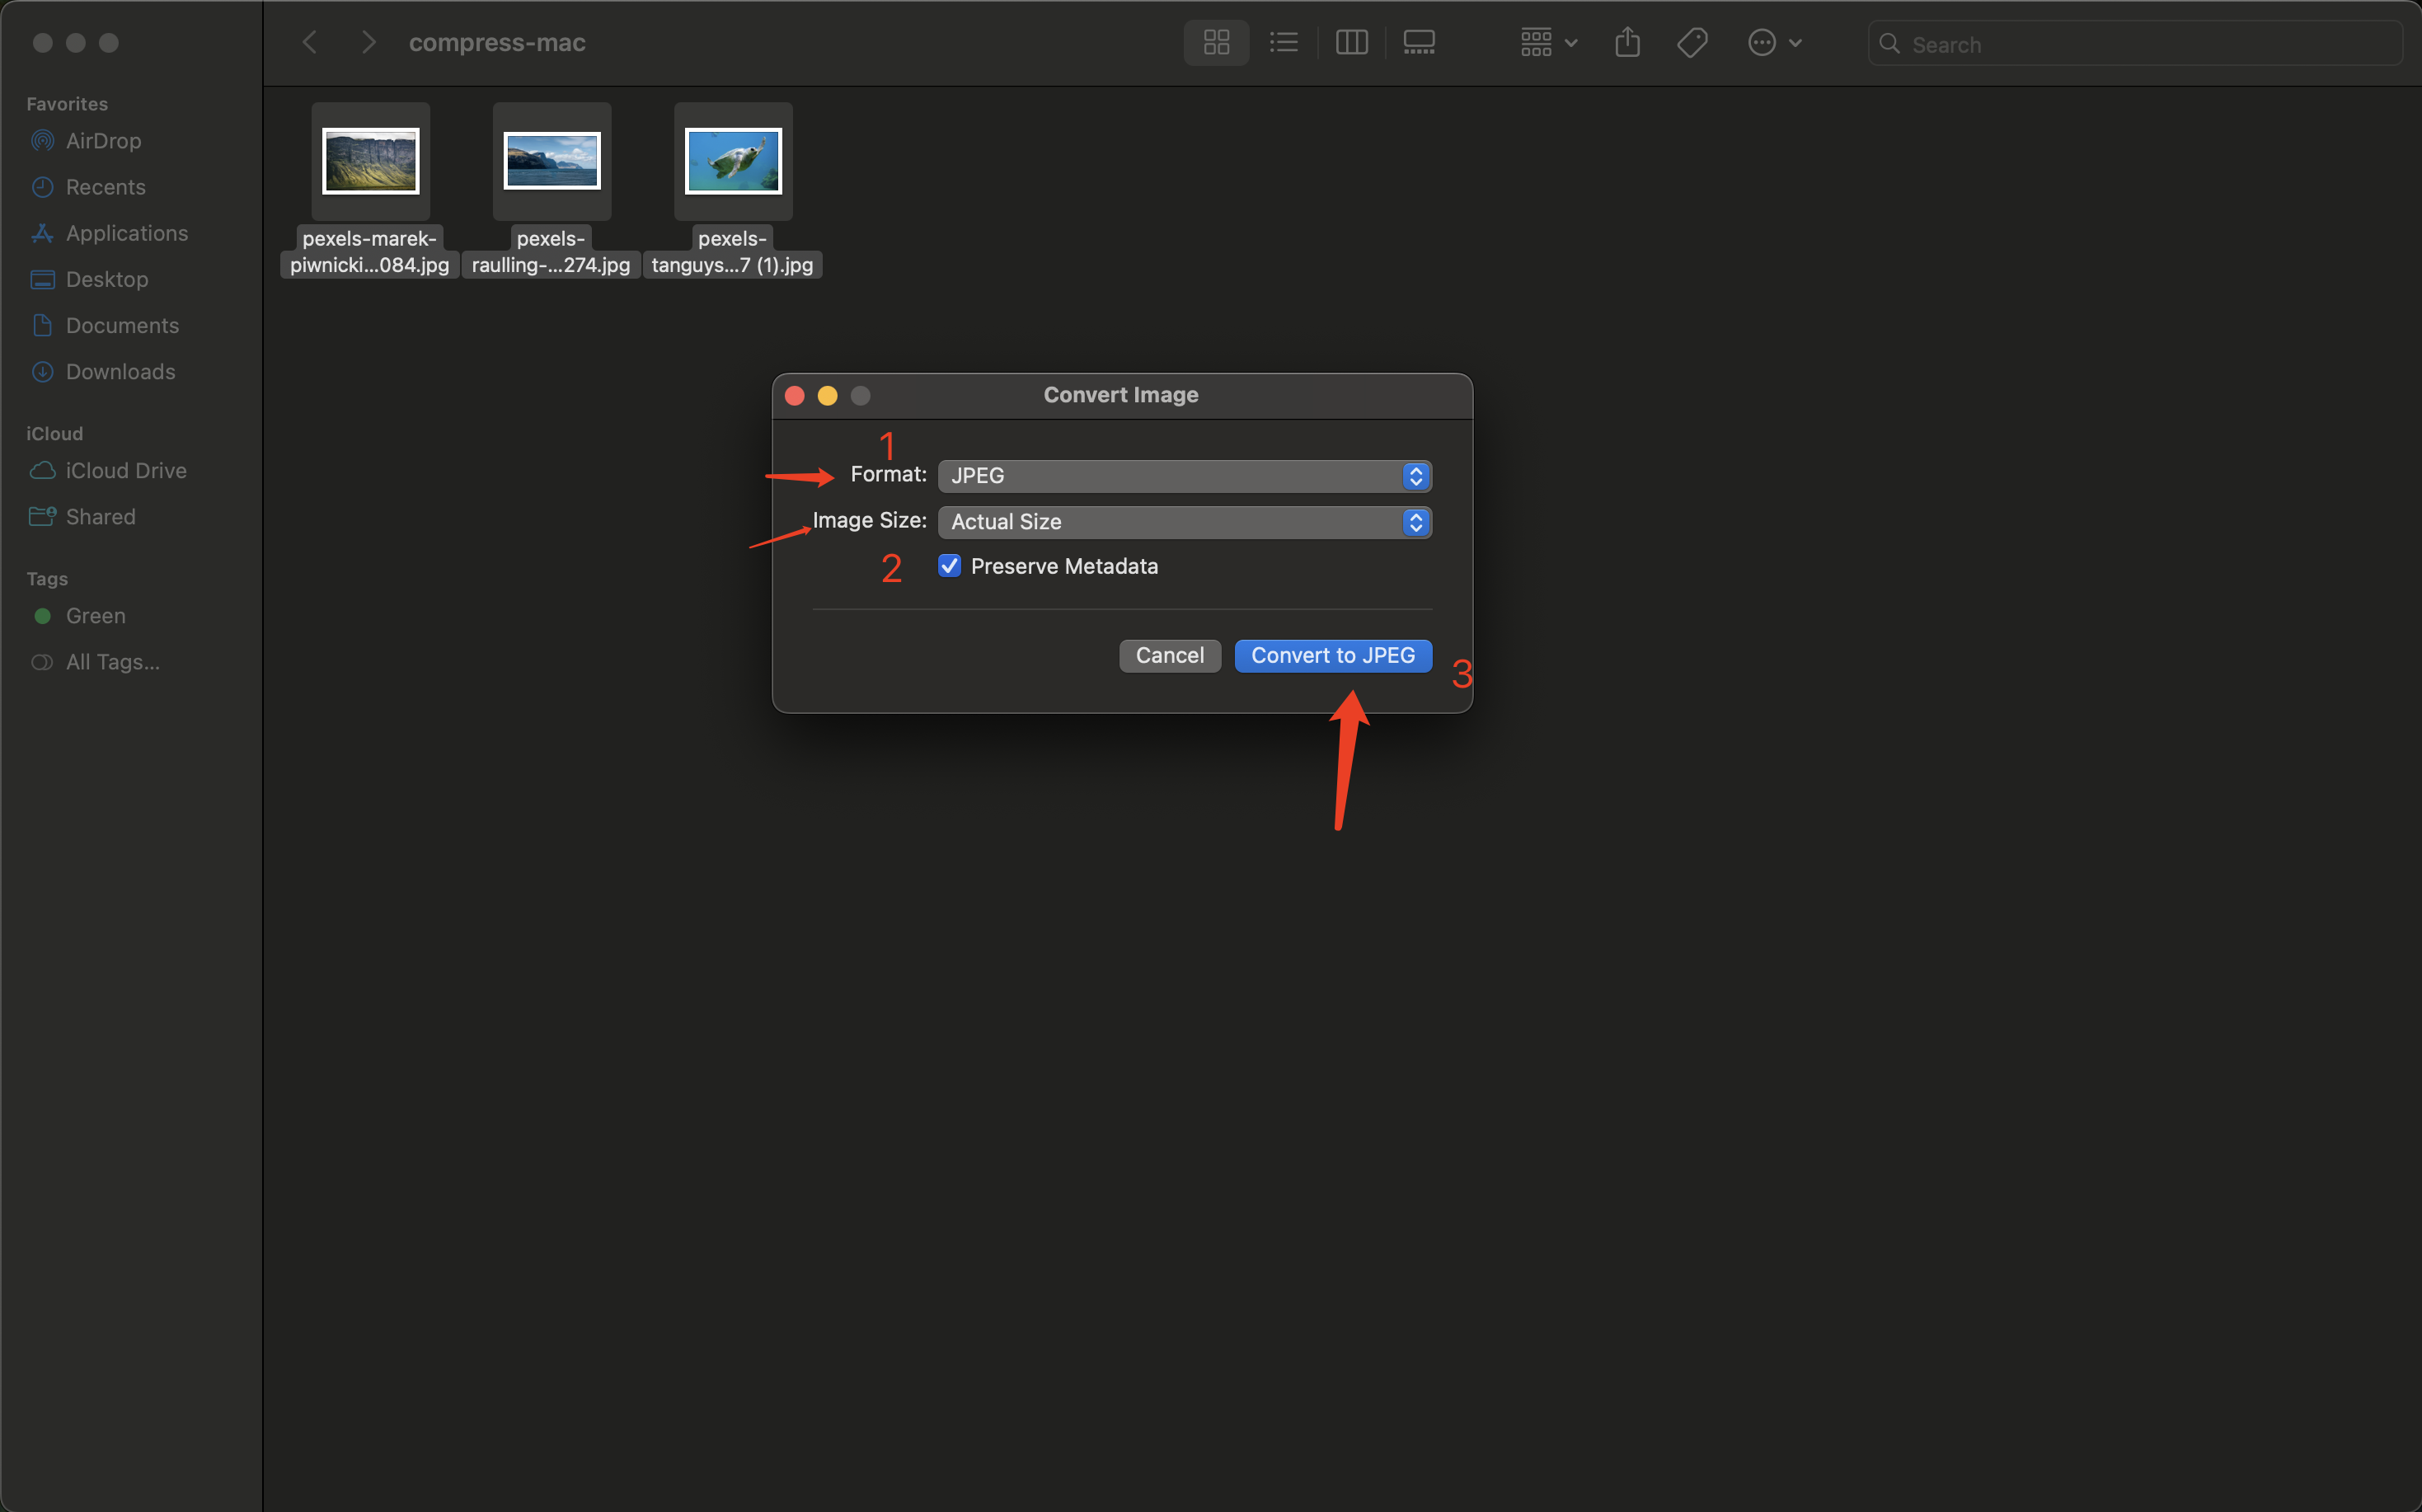
Step-by-step (Convert Image)
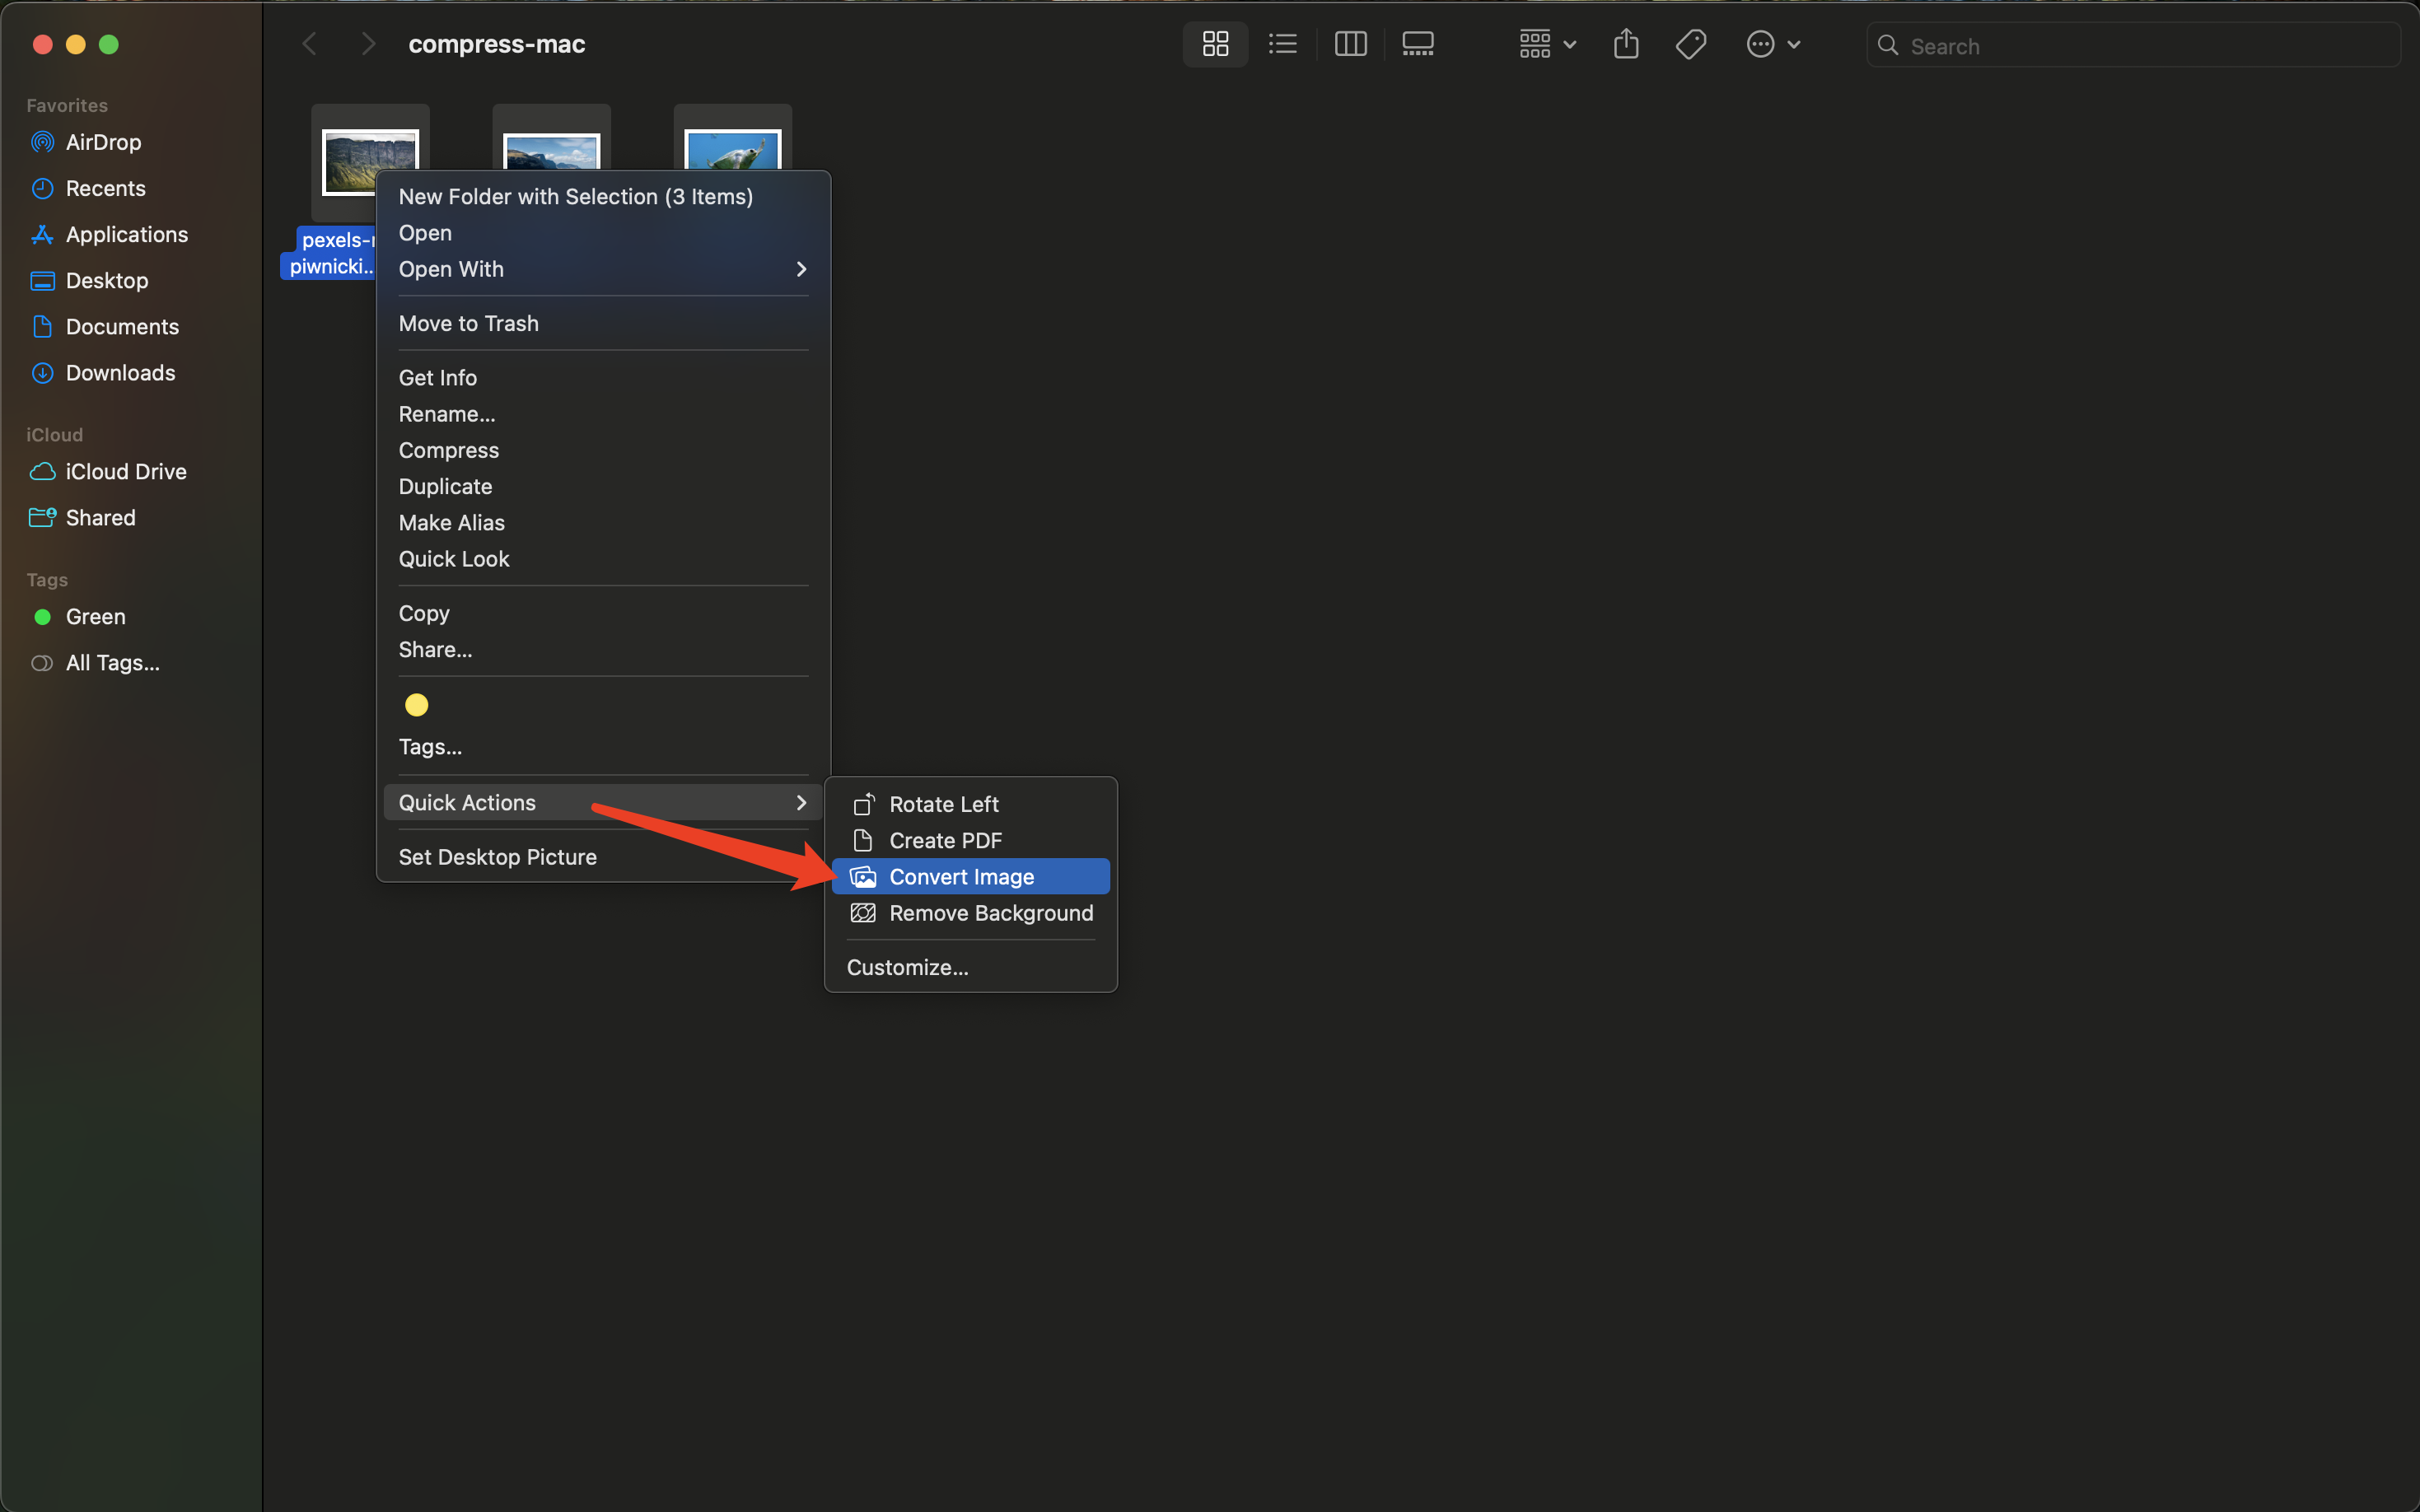
- In Finder, select multiple images (mixed formats are OK).
- Right-click → Quick Actions → Convert Image.
- In the dialog:
- Choose Format (for example, JPEG)
- Choose Image Size (Actual Size / Small / Medium / Large)
- (Optional) toggle Preserve Metadata
- Click Convert to ... to start.

The key limitation (important)
This method is mostly “dimension/format batch processing”. It’s useful, but:
- It’s not friendly for “compress to under X KB/MB”.
- Results vary depending on the image content and format.
- It’s harder to run a controlled “as small as possible, but still looks good” workflow.
- There’s no quality slider or “target file size” input for fine-tuning.
A more precise option: Use PhoEdit for target size (KB/MB) and consistent results
PhoEdit is designed for batch workflows:
- Upload multiple images at once (mixed formats are OK).
- Choose a preset for a quick quality/size balance.
- Or use Custom target file size when you must hit a specific limit.
- Download a single image or a ZIP for a batch.
Open the tool:
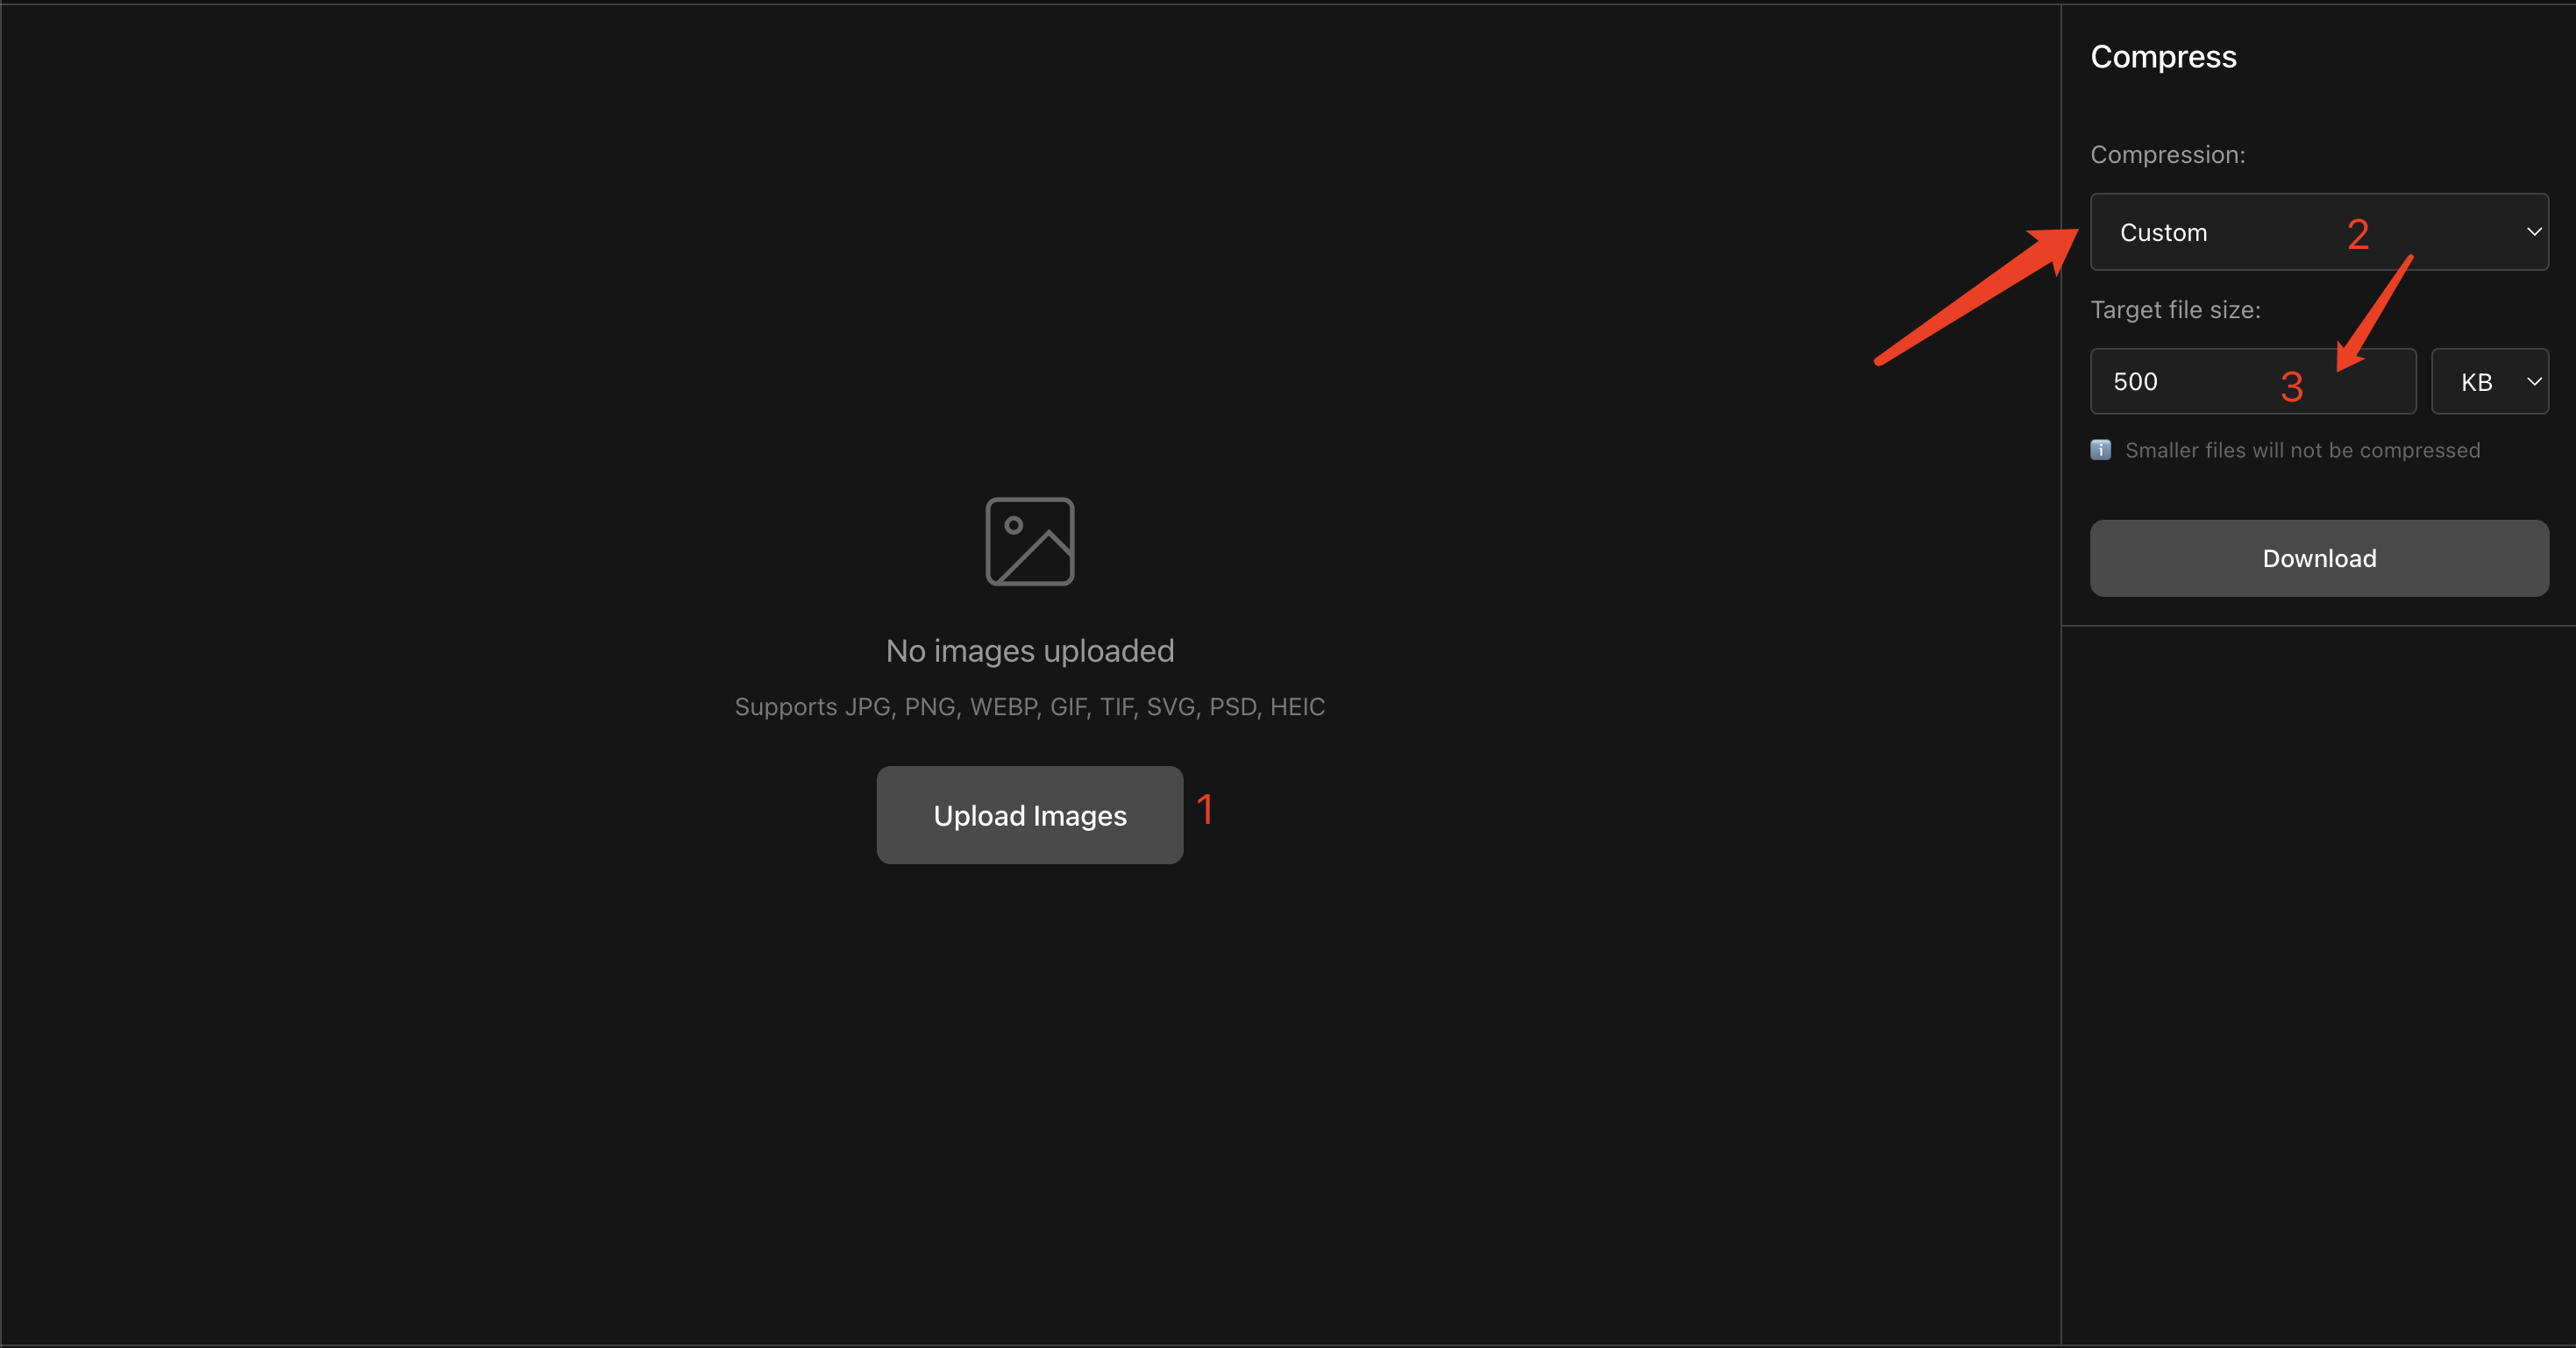
Step-by-step (maximum compression / target KB/MB)
- Upload your image(s).
- In Compression, choose Custom.
- Set a target size (e.g.,
500 KBor1 MB). - Click Download.
If you want a deeper guide on visually lossless vs. maximum compression (and batch compression), see:
Quick recommendation
- Only one image? Use Preview.
- A folder of mixed images and you don’t need a strict size target? Use Finder batch actions.
- Need batch compression and “under X KB/MB” with a more controlled quality/size balance? Use PhoEdit: Compress Image